Oh, let me tell you about my Simple Cheese Ball Recipe! This delightful appetizer has become a staple in my home, perfect for gatherings, or just a cozy night in. You know those moments when you want to impress your friends without spending hours in the kitchen? That’s where this cheese ball shines! It’s creamy, tangy, and oh-so-flavorful, and you won’t believe how easy it is to whip up. Plus, it’s vegetarian-friendly, making it a hit among all my guests.

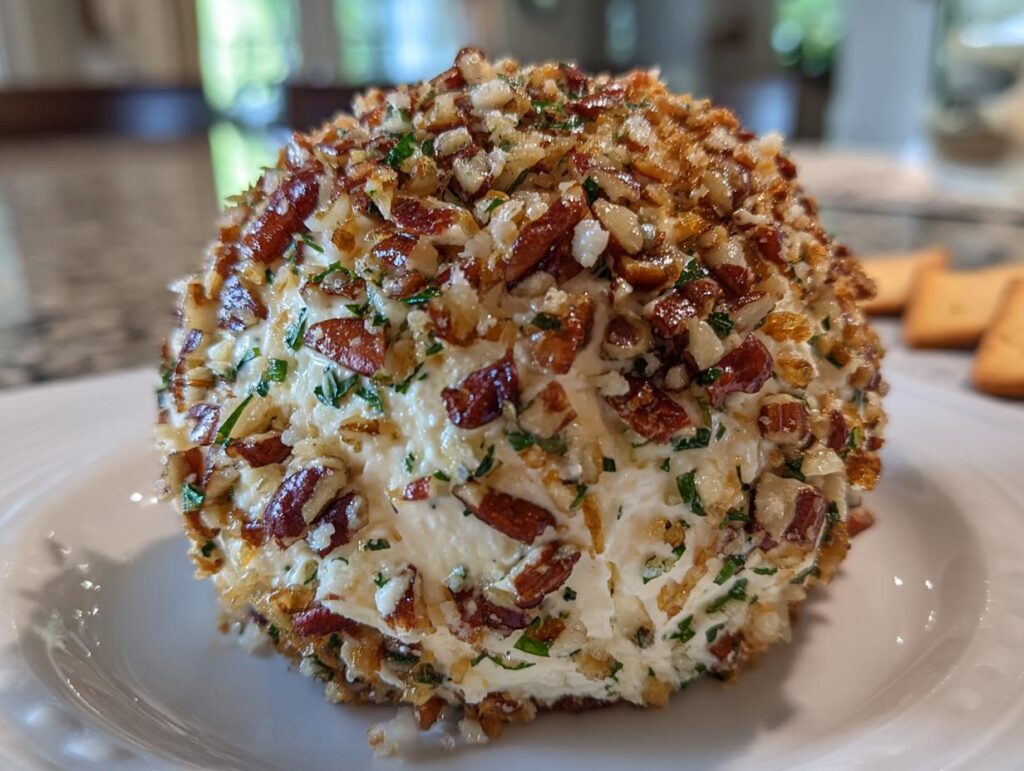
Picture this: a smooth blend of cream cheese and sharp cheddar, combined with zesty green onions and a hint of Worcestershire sauce. It’s all rolled into a beautiful ball and coated in crunchy pecans for that extra crunch. Trust me, once you set this cheese ball on the table, it’ll be gone in a flash! And the best part? You can prepare it ahead of time, letting the flavors meld together beautifully in the fridge. So let’s dive into the deliciousness of this Simple Cheese Ball Recipe, and get ready to elevate your next get-together!
Ingredients List
- 16 ounces cream cheese, softened
- 2 cups freshly grated sharp cheddar cheese
- 2 green onions, chopped
- 1 teaspoon Worcestershire sauce
- 1 teaspoon hot pepper sauce
- 1 teaspoon dried parsley flakes
- 1/2 teaspoon garlic powder
- 1/2 teaspoon dried oregano
- dash freshly ground black pepper
- 2/3 cup pecans, finely chopped
How to Prepare the Simple Cheese Ball Recipe
Alright, let’s get to the fun part! Making this Simple Cheese Ball Recipe is as straightforward as it gets, and I promise you’ll have a blast putting it together. Just follow these steps, and you’ll have a delicious appetizer ready to impress!
Step 1: Mix the Cream Cheese
First things first, you’ll want to grab your softened cream cheese. Trust me, this is super important! If your cream cheese is too cold, you won’t achieve that smooth, creamy texture we’re after. I usually take it out of the fridge about an hour before I start. Once it’s soft, pop it into a mixing bowl and mix it until it’s nice and smooth. You can use a hand mixer or a sturdy spatula – whatever you prefer! The goal here is to get it creamy and ready for all those tasty ingredients.
Step 2: Combine Ingredients
Now it’s time to add in all those delicious flavors! Toss in the freshly grated sharp cheddar cheese, chopped green onions, Worcestershire sauce, hot pepper sauce, dried parsley, garlic powder, oregano, and a dash of black pepper. Mix everything together until it’s well combined. I like to use a spatula for this part because it really helps to fold everything in without overworking the mixture. Make sure every bite will be bursting with flavor!
Step 3: Form the Cheese Ball
Once everything is mixed in, it’s time to gather the mixture into one lump. Use your rubber spatula to scrape down the sides of the bowl and get it all together. Here’s a little tip: lightly grease your hands with a bit of oil or cooking spray before you start shaping the cheese ball. This will prevent the mixture from sticking to your fingers. Form the mixture into a nice round ball, making sure it’s compact. It’s okay if it’s not perfect – it’s the taste that counts!
Step 4: Coat with Pecans
Next up, we’re going to make this cheese ball look as good as it tastes! Spread the finely chopped pecans on a plate. Carefully roll the cheese ball in the pecans, pressing them in gently so they stick. This gives the cheese ball a beautiful, crunchy exterior that not only looks amazing but adds a lovely texture when you take a bite. Don’t worry if a few pecans fall off – just sprinkle them back on!
Step 5: Chill Before Serving
Now, here’s the part that helps all those wonderful flavors meld together. Wrap your cheese ball in cling wrap and pop it in the fridge for about an hour. This chilling time is crucial! It allows the flavors to develop and the cheese ball to firm up, making it easier to slice. When you’re ready to serve, take it out of the fridge about 20 minutes beforehand. This way, it’ll soften just a little, making it easier to spread on your favorite crackers or veggies!
Why You’ll Love This Recipe
This Simple Cheese Ball Recipe is a game-changer for any gathering or cozy night at home! Here’s why it’s sure to become a favorite:
- Effortless Preparation: You can whip this cheese ball up in just 20 minutes! It’s a no-fuss recipe that lets you spend more time enjoying your guests.
- Delicious Flavor: With a perfect blend of creamy cream cheese, sharp cheddar, and zesty seasonings, every bite bursts with flavor that’ll keep everyone coming back for more.
- Vegetarian-Friendly: This recipe is a hit with all guests, including vegetarians. It’s a versatile appetizer that fits right into everyone’s diet.
- Perfect for Any Occasion: Whether it’s a holiday party, game day, or just a casual get-together, this cheese ball is bound to impress!
- Make-Ahead Convenience: You can prep this cheese ball in advance and store it in the fridge. It’s a lifesaver for busy hosts!
Tips for Success
Now that you’re all set to make my Simple Cheese Ball Recipe, here are some tried-and-true tips to ensure it turns out perfectly every time. Trust me, these little nuggets of wisdom can make all the difference!
Use Quality Ingredients
Always opt for high-quality cream cheese and freshly grated cheddar. The flavor really shines through when you use the good stuff! Block cheese is a must because it grates much better than pre-shredded varieties, which often contain anti-caking agents.
Adjust the Spice Level
If you’re sensitive to heat, feel free to cut back on the hot pepper sauce. You can always start with half the amount and adjust to your taste. Remember, you can add more heat but can’t take it away once it’s in!
Experiment with Mix-Ins
This is your cheese ball, so don’t be afraid to get creative! You can add in diced jalapeños for a kick, or even some crumbled bacon for a smoky flavor. Fresh herbs like dill or chives can also elevate the taste!
Presentation is Key
When it comes to serving, a pretty presentation goes a long way! You can place the cheese ball on a decorative platter surrounded by an array of colorful veggies, crackers, and pretzels. It’ll be the centerpiece of your appetizer table!
Serving Temperature Matters
Remember to take the cheese ball out of the fridge about 20 minutes before serving. This helps it soften a bit, making it easier to spread on crackers or veggies. No one likes a cheese ball that’s too hard to scoop!
Storage Tips
If you have leftovers (which is rare, but possible!), store them wrapped tightly in cling wrap in the fridge. It should keep well for about a week. Just remember, the flavors will continue to deepen the longer it sits!
With these tips, you’re all set to make the best cheese ball ever! I can’t wait for you to share it with friends and family – it’s sure to be a hit!
Nutritional Information
Here’s a quick glance at the estimated nutritional values for a typical serving size of my Simple Cheese Ball Recipe. Keep in mind, these values are approximate and can vary based on the specific ingredients you use!
- Calories: 124
- Fat: 12g
- Saturated Fat: 6g
- Unsaturated Fat: 5g
- Trans Fat: 0g
- Cholesterol: 29mg
- Sodium: 129mg
- Carbohydrates: 2g
- Fiber: 0.3g
- Sugar: 1g
- Protein: 4g
This cheese ball packs a flavorful punch without too many carbs, making it a delightful addition to your appetizer spread. Enjoy every bite, guilt-free!
FAQ Section
Can I make this cheese ball ahead of time?
Absolutely! One of the best things about my Simple Cheese Ball Recipe is that it’s perfect for making ahead of time. You can prepare the cheese ball without the pecans and wrap it tightly in cling wrap. Just pop it in the fridge for up to a week! When you’re ready to serve, take it out, roll it in the pecans, and let it chill for about an hour to firm up before serving. This way, you can enjoy all the flavor without the last-minute rush!
What can I serve with the cheese ball?
The options are endless when it comes to serving this cheese ball! I love to pair it with a variety of crackers and pretzels for that perfect crunch. Fresh veggies like sliced bell peppers, carrots, and celery sticks are also fantastic – they add a nice contrast to the creamy cheese ball. If you want to get a little fancy, consider some artisan bread or even apple slices for a sweet touch. Trust me, your guests will love mixing and matching!
How long can I store leftovers?
If you happen to have any leftovers (which is rare, but hey, it happens!), you can store the cheese ball in the fridge for about a week. Just make sure to wrap it tightly in cling wrap to keep it fresh. If you want to keep it longer, you can freeze it before coating with pecans. Just thaw it in the fridge overnight when you’re ready to enjoy it again. It’s a great way to have a tasty appetizer ready whenever you need it!

Serving Suggestions
Now that you’ve made your Simple Cheese Ball Recipe, let’s talk about how to serve it up in style! Presentation can really elevate your appetizer game, and there are so many delicious options to pair with this creamy, cheesy delight. Here are some of my favorite serving ideas:
- Classic Crackers: You can’t go wrong with a selection of crunchy crackers! I love to include a mix of flavors – think buttery, whole grain, and even herbed crackers. They provide the perfect vehicle for scooping up that rich cheese ball.
- Salty Pretzels: For a fun twist, serve your cheese ball with pretzel crisps or regular pretzels. Their salty crunch complements the creaminess of the cheese ball beautifully. Plus, they’re easy for guests to grab and munch on!
- Fresh Veggies: Add a colorful platter of fresh vegetables for a refreshing contrast. Sliced bell peppers, carrot sticks, celery, and cucumber rounds not only look great but also offer a healthy crunch. They’re perfect for dipping and balancing the richness of the cheese.
- Artisan Bread: For a more sophisticated touch, consider serving the cheese ball with slices of artisan bread or baguette. The chewy texture pairs wonderfully with the creamy cheese, and it gives your appetizer spread a gourmet feel.
- Fruit Pairing: For a sweet contrast, sliced apples or pears are delightful accompaniments. The sweetness of the fruit beautifully balances the savory flavors of the cheese ball. You could even add some dried fruits like apricots or figs for a more diverse platter!
Feel free to mix and match these options to suit your gathering’s vibe! Whatever you choose, I promise your cheese ball will be the star of the show. Enjoy every bite, and watch your friends and family rave about this delightful appetizer!
For more recipes follow me in page Pinterest.
Print
Simple Cheese Ball Recipe: 5 Flavorful Tips to Impress
- Total Time: 1 hour 20 minutes
- Yield: 8 servings 1x
- Diet: Vegetarian
Description
Simple Cheese Ball Recipe
Ingredients
- 16 ounces cream cheese, softened
- 2 cups freshly grated sharp cheddar cheese
- 2 green onions, chopped
- 1 teaspoon Worcestershire sauce
- 1 teaspoon hot pepper sauce
- 1 teaspoon dried parsley flakes
- 1/2 teaspoon garlic powder
- 1/2 teaspoon dried oregano
- dash freshly ground black pepper
- 2/3 cup pecans, finely chopped
Instructions
- Place cream cheese in a mixing bowl and mix until smooth.
- Add cheese, green onion, Worcestershire sauce, hot sauce, parsley, garlic powder, oregano, and pepper. Mix well.
- Use a rubber spatula to gather the mixture into one lump.
- Lightly grease your hands and form the mixture into a round ball.
- Place the pecans on a plate. Scoop the pecans onto the outside of the ball, pressing them in gently.
- Cover the cheeseball in cling wrap and refrigerate for about 1 hour.
- Remove from fridge 20 minutes before serving.
- Serve with crackers, pretzels, or vegetables.
Notes
- Use a spreading knife to serve the cheeseball.
- Regular or low fat cream cheese works fine.
- Use block sharp cheddar and grate it yourself.
- Substitute almonds or other finely chopped nuts if desired.
- Prep the cheeseball ahead without nuts and store in the refrigerator for up to a week.
- Store in the refrigerator for several days or up to 2 weeks.
- Wrap and freeze for up to one month without nuts.
- Prep Time: 20 minutes
- Cook Time: 0 minutes
- Category: Appetizer
- Method: Mixing and Chilling
- Cuisine: American
Nutrition
- Serving Size: 1 ounce
- Calories: 124
- Sugar: 1g
- Sodium: 129mg
- Fat: 12g
- Saturated Fat: 6g
- Unsaturated Fat: 5g
- Trans Fat: 0g
- Carbohydrates: 2g
- Fiber: 0.3g
- Protein: 4g
- Cholesterol: 29mg
Keywords: cheese ball, appetizer, party food