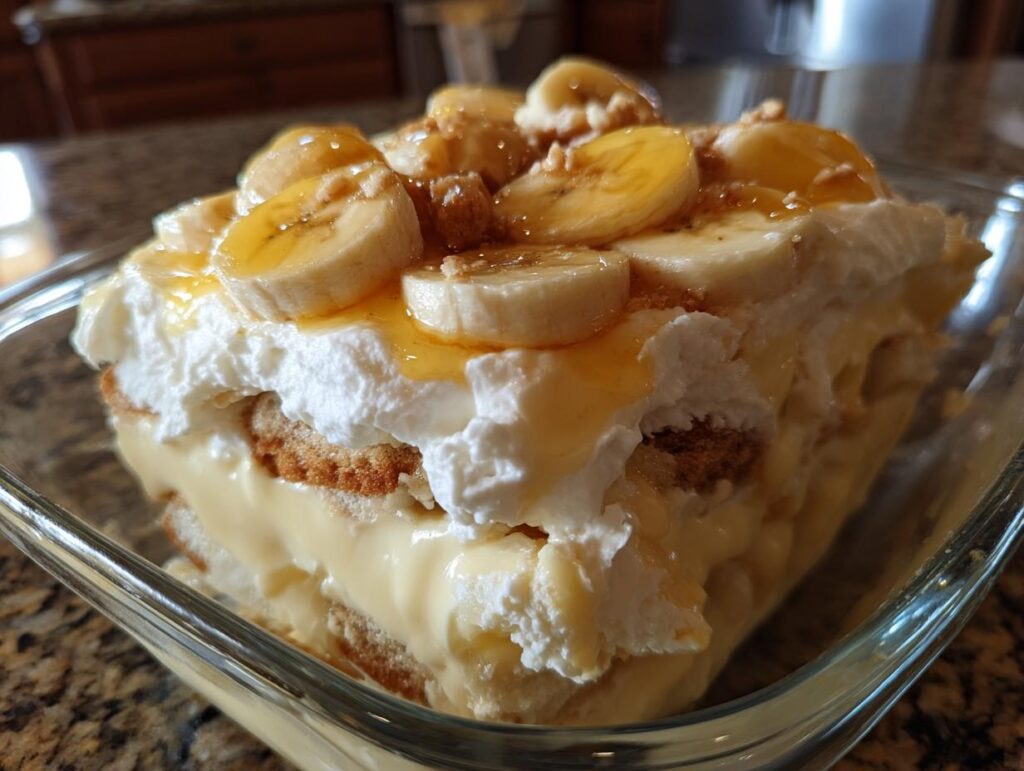
Ah, Old-Fashioned Homemade Banana Pudding! If there’s a dessert that instantly transports me back to my childhood, it’s this one. I still remember the warm afternoons spent at my grandma’s house, the air thick with the sweet aroma of ripe bananas and creamy pudding. This classic dessert combines luscious layers of creamy pudding, perfectly ripe bananas, and crunchy vanilla wafers, creating a symphony of textures and flavors that just sings to your soul. Trust me, there’s something magical about the way those layers come together, each bite a delightful reminder of simpler times.
This recipe is not just about the ingredients; it’s about love and tradition. My grandma always insisted on using ripe bananas for that extra sweetness—she knew what she was doing! As I share this recipe with you, I can’t help but feel her presence guiding me. It’s a dish that brings family together, making it perfect for gatherings or simply a cozy night in. So grab your mixing bowl and let’s dive into the world of Old-Fashioned Homemade Banana Pudding, where every spoonful is a nostalgic hug from the past!
Ingredients List
Here’s what you’ll need to whip up this delightful Old-Fashioned Homemade Banana Pudding. Make sure you have everything on hand before you start for a smooth baking experience!
- ¾ cup sugar
- ¼ cup all-purpose flour
- ¼ teaspoon salt
- 3 cups milk
- 3 large eggs
- 2 teaspoons vanilla extract
- 1 box vanilla wafers (about 8 oz)
- 4 ripe bananas, sliced
Using ripe bananas is key here—they add that natural sweetness and creaminess that makes this dessert sing! Trust me, don’t skip on the vanilla wafers either; they provide that delightful crunch that contrasts beautifully with the silky pudding and soft bananas. Gather these ingredients, and let’s get ready to create a dessert that’s bound to impress!
How to Prepare Old-Fashioned Homemade Banana Pudding
Making Old-Fashioned Homemade Banana Pudding is easier than you might think! Just follow these steps, and you’ll have a luscious dessert that will impress everyone at the table. Let’s get started!
- Combine the dry ingredients: In a medium saucepan, whisk together ¾ cup sugar, ¼ cup all-purpose flour, and ¼ teaspoon salt. This mixture will be the base of your pudding, so make sure it’s mixed well.
- Add the milk: Gradually whisk in 3 cups of milk. Take your time here; you want to ensure there are no lumps. Stir until everything is smooth and well combined.
- Cook the mixture: Place the saucepan on the stove over medium heat. Stir constantly as the mixture heats up—you don’t want it to stick or scorch! Keep stirring until it thickens and starts bubbling, which should take about 5-7 minutes. Once it’s thick, reduce the heat to low and let it cook for an additional 2 minutes. This is crucial for developing that creamy texture.
- Prepare the eggs: While the pudding is cooking, crack 3 large eggs into a small bowl and whisk them. This step is super important—you’re going to temper the eggs to avoid scrambling them! Slowly add a small amount of the hot milk mixture into the eggs while whisking constantly. This warms them up gently.
- Combine the egg mixture: Once you’ve tempered the eggs, pour this mixture back into the saucepan with the remaining pudding. Return it to the heat and cook for about 2 more minutes, stirring continuously until it reaches a gentle boil. You’ll see it thicken even further. Don’t forget to stir in 2 teaspoons of vanilla extract right after you remove it from the heat. The aroma of vanilla will fill your kitchen!
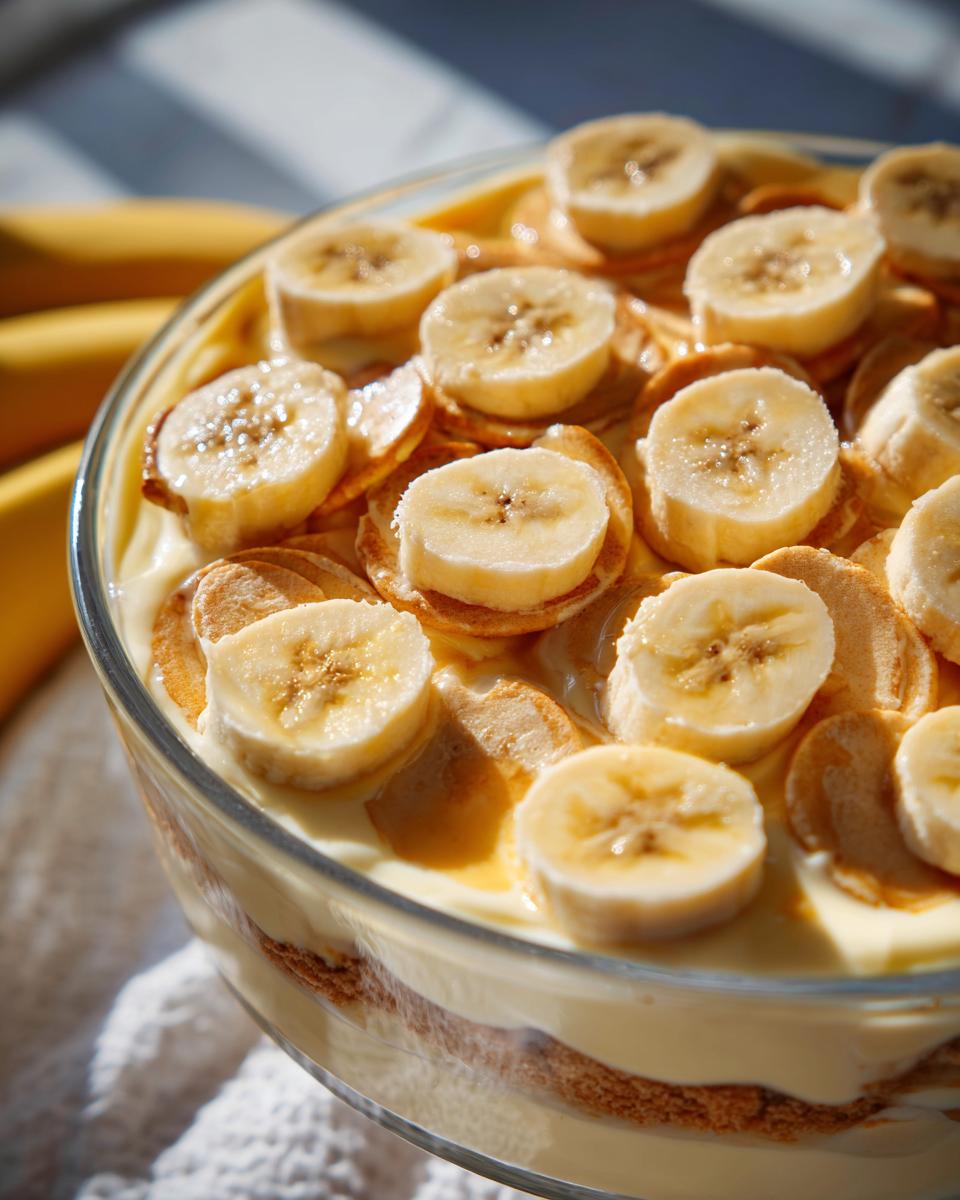
- Layer the pudding: Now comes the fun part! In an ungreased 8-inch square dish, start by placing a layer of about 25 vanilla wafers at the bottom. Next, add half of your sliced bananas—4 ripe bananas, to be exact. Pour half of the warm pudding over the bananas, spreading it gently.
- Repeat the layers: Add another layer of vanilla wafers, followed by the remaining banana slices, and finish with the rest of the pudding. Make sure the pudding covers everything nicely!
- Chill the pudding: Cover the dish with plastic wrap and refrigerate it for at least 4 hours, but if you can let it sit overnight, do it! This allows all those flavors to meld beautifully. Trust me, it’s worth the wait!
- Finish and serve: Just before serving, crush the remaining vanilla wafers and sprinkle them over the top for that delightful crunch. Serve it chilled, and watch as everyone digs in!
And there you have it—your very own Old-Fashioned Homemade Banana Pudding! It’s a labor of love that’s sure to delight your family and friends. Enjoy every creamy, dreamy bite!
Why You’ll Love This Recipe
Old-Fashioned Homemade Banana Pudding isn’t just a dessert; it’s a slice of nostalgia and a crowd-pleaser that brings everyone together. Here’s why you’ll absolutely adore making this classic treat:
- Simple and Quick: With just a few basic ingredients and straightforward steps, you can whip up this delightful dessert in no time. It’s perfect for both novice and seasoned bakers!
- Layers of Flavor: The combination of creamy pudding, sweet bananas, and crunchy vanilla wafers creates a delightful harmony of textures and flavors that will leave your taste buds dancing.
- Nostalgic Comfort: This recipe brings back warm memories of family gatherings and childhood afternoons. Each bite is like a cozy hug from the past, reminding you of simpler times.
- Make-Ahead Magic: You can prepare this dessert the day before, allowing the flavors to meld beautifully while you kick back and relax. It’s a stress-free way to impress your guests!
- Customizable: Feel free to play around with toppings or add your own twist. Whether you prefer a sprinkle of chocolate shavings or a dollop of whipped cream, the possibilities are endless!
Trust me, once you dive into this Old-Fashioned Homemade Banana Pudding, you’ll understand why it’s a beloved classic that keeps everyone coming back for more!
Tips for Success
When it comes to making the perfect Old-Fashioned Homemade Banana Pudding, a few tried-and-true tips can make all the difference. I’ve learned these through years of experimenting and, of course, from my grandma’s wisdom. So, let’s make sure your pudding turns out dreamy and delicious!
Choose ripe bananas
Trust me on this one—using ripe bananas is absolutely essential! Look for bananas that are just starting to get brown spots; they’re sweeter and creamier, which adds that irresistible flavor to your pudding. Overripe, mushy bananas work perfectly too—just slice them up and let their sweetness shine!
Don’t rush the cooking
When you’re cooking the pudding mixture, patience is key. Stir constantly over medium heat until it thickens and bubbles. If you rush this step, you risk ending up with a grainy texture instead of that smooth, velvety pudding we all love. Take your time, and let the magic happen!
Tempering the eggs is crucial
Tempering the eggs might sound fancy, but it’s a simple and necessary step to avoid scrambling them. Remember to add just a little bit of the hot mixture to the eggs while whisking continuously. This gradual warming process helps the eggs blend smoothly back into the pudding without any curdling. It’s all about keeping that creamy consistency!
Layer it right
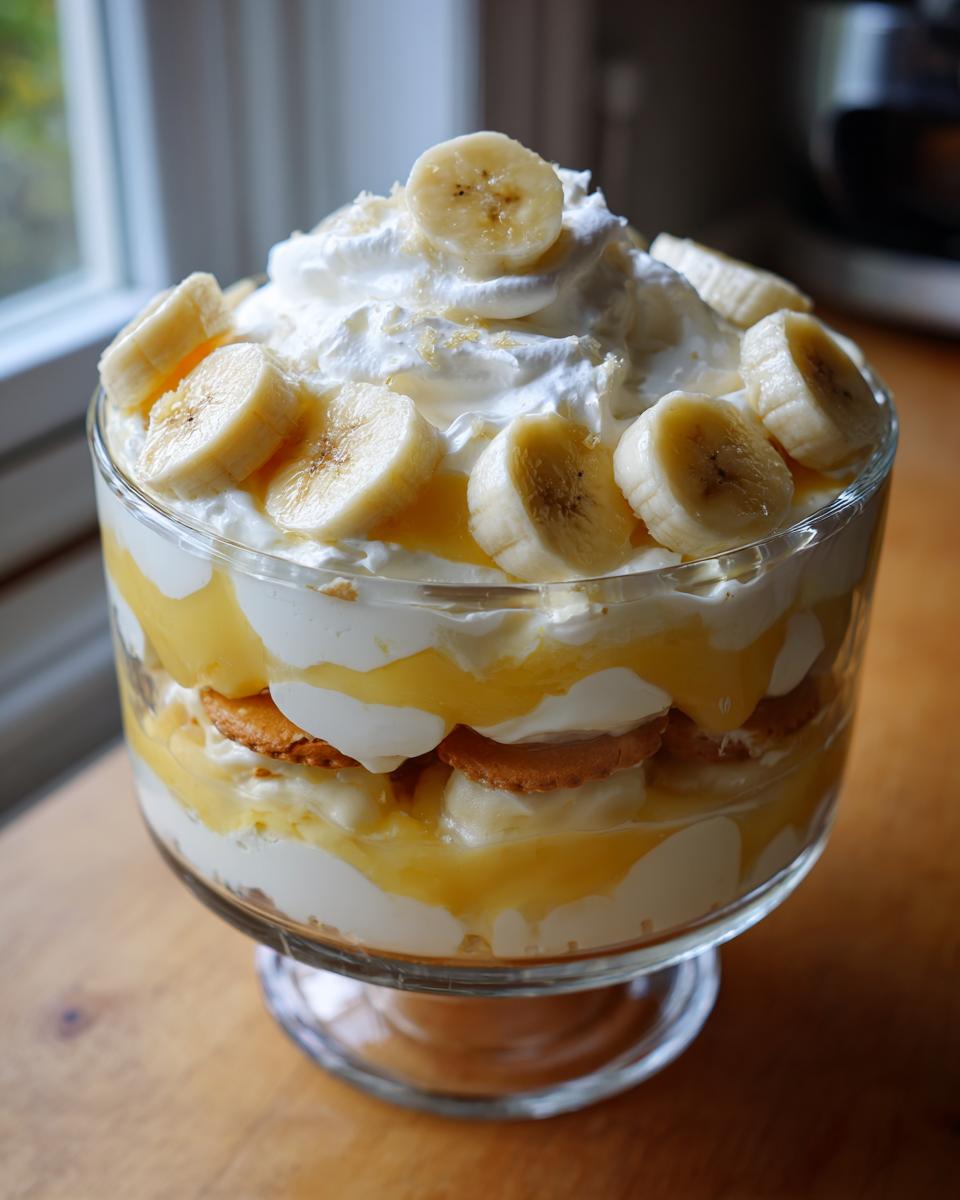
Layering is where the fun really starts! When you’re assembling the pudding, be gentle when placing the bananas and wafers. You want to create beautiful layers, so the presentation is as delightful as the taste. Make sure the pudding covers everything well to keep the bananas from browning too quickly. It’s all about that visual appeal!
Let it chill
Don’t skip the chilling time, friends! Cover your pudding with plastic wrap and let it sit in the fridge for at least 4 hours, but overnight is even better. This allows the flavors to meld and the pudding to set perfectly. Trust me, the wait is worth it for that luxurious, creamy texture!
Presentation matters
Before serving, I love to crush some extra vanilla wafers and sprinkle them on top for that perfect finishing touch. It adds a lovely crunch and looks so inviting! You can also toss on a few fresh banana slices or even a dollop of whipped cream if you want to elevate your presentation. It’s all about making it visually appealing for your guests!
With these tips in mind, you’re all set to create an unforgettable Old-Fashioned Homemade Banana Pudding that will have everyone asking for seconds. Happy cooking!
Variations
Old-Fashioned Homemade Banana Pudding is delicious as is, but if you’re feeling adventurous, there are plenty of fun variations you can try to put your own spin on this classic dessert! Here are some ideas that I absolutely love:
Chocolate Lovers’ Delight
If you’re a chocolate fan, why not add a little cocoa powder to the pudding? Just whisk in about ¼ cup of unsweetened cocoa powder when you combine the dry ingredients. It’ll create a rich chocolate banana pudding that’s simply divine! You could even top it with chocolate shavings or chocolate wafer cookies for an extra treat.
Nutty Banana Pudding
Add some crunch by incorporating chopped nuts! Walnuts or pecans work wonderfully. Just sprinkle a handful between the layers of bananas and pudding for that delightful texture. You can also toast the nuts lightly before adding them for an extra depth of flavor. Yum!
Coconut Cream Twist
For a tropical twist, mix in some shredded coconut into the pudding before layering. About ½ cup of sweetened shredded coconut will give it a wonderful coconut flavor. You can also use coconut-flavored whipped cream on top for an extra tropical flair!
Vanilla Bean Version
Want to elevate the flavor? Use the seeds from a real vanilla bean instead of vanilla extract! Just split the bean lengthwise and scrape out the seeds, adding them to your milk mixture. It gives the pudding a gourmet touch and those lovely little specks of vanilla bean throughout.
Dairy-Free Option
If you’re looking for a dairy-free version, you can swap out the milk for almond milk or coconut milk. Just make sure to choose a dairy-free alternative that complements the flavor well. For the eggs, consider using a flaxseed meal or a store-bought egg replacer. It’s a great way to enjoy this dessert while accommodating dietary preferences!
Seasonal Fruit Additions
Feel free to mix in other fruits for seasonal variations. Sliced strawberries, blueberries, or even peaches can be layered in with the bananas for a fruity twist! Just be mindful of the moisture they add—some fruits may need to be drained a bit before layering to prevent the pudding from getting too watery.
So there you have it! Whether you want to stick with the classic recipe or explore these fun variations, Old-Fashioned Homemade Banana Pudding is always a hit. Get creative, and make it your own—you won’t be disappointed!
Storage & Reheating Instructions
Storing your Old-Fashioned Homemade Banana Pudding is super simple, and following these steps will ensure it stays fresh and delicious for as long as possible!
How to Store Leftovers
After you’ve indulged in your pudding, cover it tightly with plastic wrap or transfer it to an airtight container. This helps prevent any unwanted odors from sneaking in and keeps the pudding creamy. You can keep it in the refrigerator for up to 3 days. Just remember that the bananas may brown a bit over time, but they’ll still taste fantastic!
Reheating Instructions
Now, I know you might be tempted to heat this pudding up, but let me tell you, it’s best served chilled! If you do want to enjoy it warm, gently heat individual portions in the microwave for about 15-20 seconds, just until it’s slightly warm. Make sure to stir it well before enjoying to avoid any hot spots. But honestly, I think the cool and creamy texture is where all the magic lies!
So, whether you’re savoring your leftovers right away or saving some for later, following these storage tips will keep your Old-Fashioned Homemade Banana Pudding tasting amazing! Enjoy every last bite!
Nutritional Information
When you indulge in a serving of Old-Fashioned Homemade Banana Pudding, here’s what you can expect in terms of nutrition. Keep in mind that these values are estimates and can vary based on specific ingredients used and portion sizes.
- Calories: 221 kcal
- Fat: 5 g
- Saturated Fat: 2 g
- Cholesterol: 72 mg
- Sodium: 132 mg
- Carbohydrates: 40 g
- Fiber: 2 g
- Sugar: 31 g
- Protein: 6 g
This delightful dessert is a great way to satisfy your sweet tooth while also enjoying a bit of fruit. With the creamy pudding, bananas, and crunchy wafers, each bite is not just delicious, but a sweet treat that’s hard to resist! Enjoy your homemade banana pudding with the knowledge that it brings a little joy and nostalgia to your plate!
FAQ Section
Got questions about making Old-Fashioned Homemade Banana Pudding? Don’t worry, I’ve got you covered! Here are some common questions and answers to help you navigate this classic dessert.
Can I use other types of bananas for this recipe?
While I always recommend using ripe bananas for that natural sweetness and creamy texture, you can use other types of bananas if you like. Just keep in mind that the flavor profile may change slightly. Plantains, for example, are firmer and less sweet, so they might not give you that classic banana pudding taste you’re after!
What can I do if my pudding doesn’t thicken?
If your pudding isn’t thickening as it should, don’t panic! It might need a little more cooking time. Make sure you’re stirring constantly and heating it until it reaches a gentle boil. If it’s still runny after this, you can mix a tablespoon of cornstarch with a little cold milk and stir it into the pudding while it’s cooking. This will help it thicken up!
How can I make this recipe gluten-free?
To make Old-Fashioned Homemade Banana Pudding gluten-free, simply substitute the all-purpose flour with a gluten-free flour blend. Be sure to check the label on your vanilla wafers as well, as some brands contain gluten. There are gluten-free alternatives available that taste just as delicious!
How long can I keep the pudding in the fridge?
You can store your Old-Fashioned Homemade Banana Pudding in the refrigerator for up to 3 days. Just be aware that the bananas may brown over time, but the flavor will still be delightful. If you want it to last a bit longer, consider adding the sliced bananas right before serving.
Can I freeze Old-Fashioned Homemade Banana Pudding?
It’s best to avoid freezing banana pudding, as the texture can change after thawing. The bananas may become mushy, and the pudding might separate. If you want to prepare it in advance, I recommend making it a day before and keeping it in the fridge instead of freezing. This way, you’ll enjoy the perfect creamy texture!
Now that you’re armed with these answers, you’re all set to tackle any challenges that come your way while making this delightful Old-Fashioned Homemade Banana Pudding. Happy baking!
Call to Action
I hope you’re as excited to try this Old-Fashioned Homemade Banana Pudding recipe as I am to share it with you! After you’ve whipped it up and indulged in those creamy, dreamy layers, I’d love to hear from you. Did it bring back any sweet memories? How did it turn out for you? Please leave a comment below and share your thoughts!
If you enjoyed this recipe, consider giving it a rating—your feedback not only helps me but also guides fellow dessert lovers in their culinary adventures. And don’t forget to share your banana pudding creations on social media! Tag me or use the hashtag #OldFashionedBananaPudding so we can all revel in the deliciousness together!
Let’s keep the love for this classic dessert alive and spread the joy of homemade treats. Happy cooking, and I can’t wait to see your beautiful banana pudding!
Print
Old-Fashioned Homemade Banana Pudding: 5 Steps to Bliss
- Total Time: 4 hours 35 minutes
- Yield: 8 servings 1x
- Diet: Vegetarian
Description
Old-Fashioned Homemade Banana Pudding is a classic dessert that combines creamy pudding, bananas, and vanilla wafers.
Ingredients
- ¾ cup sugar
- ¼ cup all-purpose flour
- ¼ teaspoon salt
- 3 cups milk
- 3 eggs
- 2 teaspoons vanilla extract
- 1 box vanilla wafers (about 8 oz)
- 4 bananas, sliced
Instructions
- In a saucepan, whisk together the sugar, flour, and salt. Gradually whisk in the milk.
- Cook over medium heat, stirring constantly, until the mixture becomes thick and bubbly. Reduce the heat to low and cook for 2 more minutes.
- Remove the saucepan from heat. In a small bowl, whisk the eggs. Slowly add a small amount of the hot milk mixture into the eggs while whisking to prevent curdling.
- Pour the egg mixture back into the saucepan. Return to heat and cook until a gentle boil begins, about 2 minutes. Stir in the vanilla extract, remove from heat, and let cool for 15 minutes, stirring occasionally.
- In an ungreased 8-inch square dish, place a layer of about 25 vanilla wafers, followed by half of the banana slices.
- Pour half of the pudding over the bananas.
- Repeat the layers once more, finishing with pudding on top.
- Cover with plastic wrap and refrigerate for at least 4 hours, preferably overnight.
- Before serving, crush the remaining vanilla wafers and sprinkle over the top. Serve chilled.
Notes
- For best flavor, let the pudding chill overnight.
- Use ripe bananas for added sweetness.
- Prep Time: 20 minutes
- Cook Time: 15 minutes
- Category: Dessert
- Method: Stovetop
- Cuisine: American
Nutrition
- Serving Size: 1 serving
- Calories: 221 kcal
- Sugar: 31 g
- Sodium: 132 mg
- Fat: 5 g
- Saturated Fat: 2 g
- Carbohydrates: 40 g
- Fiber: 2 g
- Protein: 6 g
- Cholesterol: 72 mg
Keywords: Old-Fashioned Homemade Banana Pudding, Banana Pudding, Classic Dessert